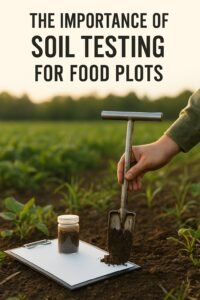
Interested in wildlife habitat improvement or planting better food plots? Our educational articles are written for Wisconsin landowners, hunters, and habitat managers looking to make informed decisions on their property.

Food Plot Soil Health: The Foundation for Strong Growth and More Deer

A Practical Guide to Soil Health for Hunters and Landowners in Wisconsin

If your food plots struggle with poor germination, thin growth, or low deer activity, the problem likely starts below the surface. Before thinking about seed blends, implements, or design, you need to start with soil health.

This guide kicks off a multi-part series to help Wisconsin landowners, hunters, and wildlife managers grow better food plots—starting from the ground up. We’ll cover essential steps like how to take a soil test, interpret the results, choose the right seed, and plant at the right time based on Wisconsin’s conditions.

Let’s begin where every successful food plot does: with the soil.


Why Soil Health Matters for Food Plots

Healthy soil is more than just dirt—it’s a living ecosystem filled with minerals, organic matter, and beneficial microbes. When your soil is balanced and active, your food plots will:

  • Produce higher-quality forage
  • Stay greener, longer
  • Attract and hold more deer
  • Improve herd nutrition
  • Maximize your hunting success

Signs Your Soil Needs Help

You don’t need lab equipment to spot poor soil. Here are common warning signs:

  • Yellow, stunted, or patchy food plot growth
  • Weeds quickly overtake your planting
  • Soil is hard, crusted, or poorly draining
  • Water pools or runs off after rain
  • Fertilizer doesn’t seem to make a difference

If any of these sound familiar, it’s time to test and fix your soil.


Step 1: Always Start with a Soil Test

Soil testing for food plots is the most important—and most overlooked—step. A basic soil test reveals:

  • Your current pH levels
  • Nutrient deficiencies
  • Exactly how much lime and fertilizer your land needs

Skipping the soil test leads to wasted time, money, and seed. We’ll dive deeper into soil sampling in the next article, but for now, remember this: a soil test is the smartest investment you can make in your food plots.


How to Fix Soil pH in Wisconsin

Across Wisconsin, many food plots suffer from low soil pH. Acidic soils prevent plants from accessing nutrients—even if you’ve added fertilizer.

  • Ideal pH range: 6.0 to 7.0
  • Below 6.0: nutrients get “locked up”
  • Apply ag lime for long-term correction
  • Use liquid lime for quicker, short-term results

Correcting your pH is often the single biggest improvement you can make. Once it’s balanced, everything else works better.


Building Long-Term Soil Health

Fixing pH is just the beginning. To get the most out of your land, focus on sustaining and improving soil health over time:

✅ Add Organic Matter

Incorporate compost, aged manure, or decomposed plant material to improve structure and increase microbial activity.

✅ Use the Right Fertilizer

Only apply what your soil test recommends. Liquid fertilizers with biological additives can boost soil health without overloading it with salts.

✅ Plant Cover Crops

Use clover, rye, or buckwheat between seasons. They protect the soil, prevent erosion, and add valuable biomass.

✅ Rotate Food Plot Crops

Alternate between heavy feeders (like brassicas or corn) and nitrogen fixers (like clover or peas) to maintain nutrient balance.

✅ Minimize Tillage

Limit disking or plowing to preserve soil structure and microbial life. Less disturbance often leads to better long-term results.


Be Patient and Stay Consistent

Improving your soil is a long-term investment. Start with one plot. Focus on pH correction, organic matter, and targeted fertilization. Over time, you’ll see easier maintenance, stronger growth, and more consistent results.


Next in the Series:

How to Take a Soil Sample and Read the Results
In the next part of this series, we’ll explain exactly how to gather soil samples, where to send them, and how to understand the numbers. This will help you make confident, informed decisions about your land and food plot strategy.


Need Help with Your Food Plots?

If you’re in Wisconsin and need help with soil testing, plot planning, or professional food plot installation, we’re here to help. TrueField Services & Rental provides hands-on, results-driven support for landowners, hunters, and wildlife managers who want to improve their land and attract more deer.

Contact us today to get started with a custom plan that fits your property and goals.

How to Take and Read a Soil Test for Food Plots

How to Sample, Read, and Use Your Soil Test Results for Better Deer Plots

If you’re planting food plots without a soil test, you’re basically guessing—and that can cost you. In Wisconsin, soils vary widely—from sandy loam in the north to heavier soils in the south. What works on one property may completely flop on another.

A proper soil test is the foundation for success. It helps you apply only what your land actually needs, saving you time and money while giving your plots the best chance to thrive.


Why Soil Testing Is a Must for Food Plots

  • Reveals your pH level and nutrient needs
  • Helps you avoid wasting fertilizer or lime
  • Creates optimal growing conditions for clover, brassicas, and other wildlife forage
  • Saves money long-term
  • Leads to healthier soil, stronger plants, and more consistent deer traffic

Even if it feels like an extra step, soil testing is the single most important thing you can do before planting.


When and How to Take a Soil Sample

🕓 Best Time to Sample:

  • Fall is ideal—gives you time to apply lime before spring planting
  • Spring also works if amendments haven’t been recently applied

🛠 What You’ll Need:

  • Soil probe or spade
  • Clean plastic bucket
  • Sample bag (from your lab or a clean zip-top bag)
  • Marker for labeling
  • Submission form from your chosen lab

📌 Step-by-Step Soil Sampling Guide:

  1. Divide your property by plot – sample each unique area separately
  2. Sample to 6 inches deep – where most roots pull nutrients
  3. Collect 10–15 cores per plot in a zigzag pattern
  4. Avoid unusual areas (brush piles, gravel driveways, old manure spots)
  5. Mix all cores in a clean bucket to create one uniform sample
  6. Fill a labeled sample bag with 1–2 cups of soil
  7. Complete the lab’s submission form with crop type (e.g. “clover mix,” “brassicas,” etc.)
  8. Mail or drop off your sample to the lab (UW Extension or a private lab)

👉 Pro tip: If you’re converting woods or prairie into a new food plot, sample at least a few months before planting so there’s time to correct soil pH or nutrients.


Understanding Your Soil Test Results

Once your test results come back, it’s time to make sense of the numbers. Here’s what to look for:


🔹 Soil pH: Your Starting Point

Most food plots perform best in a pH range of 6.0 to 7.0. If your soil is below that, it’s too acidic—nutrients get “locked up” and plants can’t absorb them properly.

  • Low pH? → Add ag lime to raise it
  • Need a quick fix? → Use liquid lime while ag lime works over time
  • Lab will tell you how much lime (in tons/acre) to apply

Fixing pH is step one—it improves germination, nutrient uptake, and overall performance.


🔹 Macronutrients (N, P, K) – The Big Three

Your test will show recommendations for:

  • Nitrogen (N) – Promotes leafy growth; especially needed for brassicas and cereal grains
  • Phosphorus (P) – Critical for roots and seed production
  • Potassium (K) – Supports stress tolerance, disease resistance, and winter survival

📌 Example: If you’re planting brassicas and the report shows low phosphorus, you might see a rec like “Add 60 lbs/acre P₂O₅.”

💡 Pro tip: Only apply what your test recommends. Over-fertilizing can cause runoff or harm plants. Balanced mixes like 13-13-13 or custom blends work well—but targeted nutrients are more efficient and cost-effective.


🔹 Organic Matter (OM)

Healthy soils have 3–5% organic matter. If yours is low (under 2.5%), your soil may struggle to retain moisture and nutrients.

To build organic matter over time:

  • Add compost or aged manure
  • Plant cover crops like rye, buckwheat, or clover
  • Avoid over-tilling

✅ High OM = better soil structure, moisture retention, and long-term fertility.


🔹 Cation Exchange Capacity (CEC)

CEC measures your soil’s ability to hold nutrients.

  • Low CEC (under 10) = sandy soil, needs lighter, more frequent applications
  • High CEC (20+) = clay-heavy soil, holds nutrients better

In Wisconsin, many soils fall in the moderate range (8–15). Your CEC helps determine how much lime or fertilizer your soil can absorb—and how often you’ll need to reapply.


🔹 Micronutrients (Optional, but Useful)

Some labs include additional elements like:

  • Calcium, Magnesium, Sulfur
  • Zinc, Iron, Manganese, Boron

Not all food plots need these. But if your report flags one as low (especially boron for brassicas or zinc for corn), follow the recommendation exactly—micronutrients are needed in tiny amounts and can be toxic if over-applied.


Using the Report to Plan Your Amendments

Now that you have the data, here’s how to act on it:

✅ Lime First

  • Apply recommended amount as soon as possible (fall is best)
  • Use ag lime or pelletized lime based on convenience
  • Incorporate it into the topsoil for faster results

✅ Fertilizer Second

  • Base your application on N-P-K recommendations
  • Use a balanced mix or combine single nutrients (urea, MAP, potash)
  • Split applications of nitrogen if planting high-demand crops
  • Incorporate fertilizer before planting, or top-dress existing plots

✅ Adjust Your Seed Plan if Needed

If pH or nutrient levels are far from ideal, plant a hardy mix first (like cereal rye and red clover) while you improve the soil. Save fussier species (like alfalfa or chicory) for later seasons once the soil is in better shape.


Sample Soil Test – Real-World Example

Let’s say you sampled a 1-acre food plot in northern Wisconsin. Here’s what the report shows:

  • pH: 5.6 → Add 2 tons/acre of ag lime
  • Organic Matter: 2.8% → Fair, but can improve
  • Phosphorus: Low → Add 60 lbs/acre P₂O₅
  • Potassium: Medium → Add 40 lbs/acre K₂O
  • Micronutrients: Boron slightly low → Add 2 lbs/acre if planting brassicas

Resulting Plan:

  • Apply lime in fall
  • Fertilize in spring with a custom blend like 50-60-40 (N-P-K)
  • Add a small amount of boron
  • Monitor performance and re-test in 2 years

Final Thoughts: Build Soil, Build Results

Soil testing isn’t just a one-time task—it’s a long-term strategy. Healthy soil leads to:

  • Better germination
  • Stronger growth
  • Higher forage production
  • More consistent deer activity

✅ Keep records
✅ Re-test every 2–3 years
✅ Adjust amendments based on results

You don’t need to guess. With a good soil test and a smart amendment plan, your food plots will pay off year after year.


Coming Up Next in the Series:

Part 3 – What to Plant and When in Wisconsin Food Plots
We’ll cover choosing the right seeds and timing your planting for maximum results based on your goals and location.


Need Help with Your Soil Test or Amendment Plan?

If you’re in Wisconsin and want help with soil sampling, lime and fertilizer planning, or complete food plot installation, reach out to TrueField Services & Rental. We help landowners turn raw ground into productive wildlife habitat—backed by real data and local experience.

📞 Contact us today to get started.